Sunday, August 14, 2022

Priority Adventure 8: Ghost Town (1980)

Among the many things that can kill a blog is a repetition of the same material over and over again.  It's possible I'm in danger of committing that sin right now, as I'm back with yet another Scott Adams text adventure.  Not only that, it's another Scott Adams treasure hunt.  I'll say this for the man, he knew what was working and he stuck with it.  Thankfully he has a habit of switching up the themes and settings.  So far he's done a D&D-style fantasy, a pirate game, a spy game in a nuclear facility, two horror-themed adventures, a sci-fi, a spy game set in a theme park, and an Egyptian adventure.  Now he's back with a game set in an Old West ghost town.  There aren't a lot of Western-themed adventure games that I'm aware of, so this one promised to be a bit of a novelty.  Well, for the sake of the blog I sure hope so...

Another accurate cover from
Adventure International

There's not a lot out there about the creation of Ghost Town.  It's coming towards the end of Adams' white hot creative output, where he released a dozen games over the course of three years.  We'll see eventually if the workload starts to affect the quality of Adams' games, but thus far he's been remarkably consistent.

I played Ghost Town back in May.  Apparently I played the TRS-80 version, as my victory screenshots at the end of this post will attest.  For reasons of convenience I used the Apple II version to get my screenshots while replaying the game to write this post.  I'm now only two games away from catching up on the games I played when I thought the blog was dead.  Once I've caught up I have some plans which might allow me to increase my output.  We'll see, I make no promises; regular readers will be aware of how erratic and inconsistent I can be with my schedule.

As I mentioned above, Ghost Town is a treasure hunt, set in an Old West ghost town.  There are thirteen treasures to collect (which I assume was done deliberately for maximum spookiness).
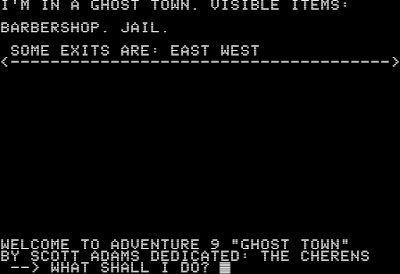
Does anyone know who the Cherens were?
I got nothing.

The game begins with the player standing out in the street of the titular ghost town.  Checking my inventory revealed that I was carrying nothing.  Typing SCORE told me that I had stored 0 treasures, giving me a score of 0 out of 100.  It also showed that I had 0 out of a possible 50 bonus points.  This was a new wrinkle to the Adams formula, and although I scored a few along the way I didn't figure the bonus points out until I started reading a walkthrough.  More on that later.

On one side of the street was a jail, with barred windows and a door latched from the inside.  On the other side was a barbershop, where I found a stetson hat.  Wearing the hat gave me the message that "something feels strange", which immediately set my alarm bells ringing.  Adams doesn't put these messages in the game for nothing, so I was convinced that there was something hidden in the hat.  Looking at it told me that the hat was my size, but nothing else I tried gave me more information.  I wouldn't figure out the hat's secret until much later.

Heading east down the road eventually led to Boot Hill (the name of TSR's western tabletop RPG, and also a common term for a burial site for gunfighters).  A rattlesnake was here, and although it wasn't particularly hostile its presence was enough to stop me from getting anything done in this area.  Trying to take the rattlesnake caused it to bite and kill me (predictably).  This was something to come back to later.

West of the barbershop and jail was more road, flanked by a saloon and a dry-goods store.  In the saloon I found a large bell and a mirror.  Looking in the mirror told me that I was "very pretty", while ringing the bell caused a ghostly voice to whisper the word "vain...".  Could these be connected?  (Probably not, because the ghost kept pestering me all over the map regardless of the bell's presence.  The ghostly voice was sometimes accompanied by a bell sound.)  I was able to take the bell, but not the mirror.

In the dry goods store I hit the inventory jackpot: a shovel, a compass (pointing north), and a dozen matches.  A sign here read "DROP *TREASURES* THEN SCORE", which could be rudimentary dating advice but in this context meant that this is where I needed to bring the town's various treasures to beat the game.  Finding the place where you need to store your treasures is always a massive relief in a Scott Adams game.

Heading west down the street again, I came to a telegraph office and a hotel.  The office contained a safe (locked) and a telegraph key,  Nothing happened when I pressed the key, so I left and entered the hotel lobby.  Behind the counter was a *cashbox* - my first treasure!  There was also a sign that read "RING FOR ROOM SERVICE".  Ringing the bell I'd found in the saloon seemed like the thing to do, but had no effect here.  East of the lobby was an empty hotel room.  Empty rooms are always suspicious in these games, so I tried ringing the bell again (it was for room service, after all).  This caused a bed to appear.  I was able to get inside the bed, but no amount of examining or trying to look under the bed revealed anything.  This was another mystery for later.

Even further west down the road I came to a stable.  Inside I found a stall and a manure pile.  There was a horse in the stall (called 'Ole Paint, which is apparently an American breed of horse), and a horseshoe.  Getting on the horse was the obvious course here, and once I was up there I found some *silver spurs* (where were they before?).  I tried putting them on and spurring the horse, but he bucked me off into the manure pile.

(On the subject of 'Ole Paint, I assume that I'm supposed to read its name as "Old Paint", but the placement of the apostrophe makes that difficult.  It should be spelled Ol' Paint, but as it is in the game the horse has a name like Hole Paint, Pole Paint, or maybe even Swole Paint.)

Leaving the horse for now, I used my shovel to dig in the manure pile.  All I found was a pile of white crystals.  Back in the stall I saw that there was now a hole in the wall and a bare hoof print.  I tried shoeing the horse, only to be told that I was missing something (nails, I suspect).  Sure enough, through the hole was a storeroom where I found a keg of nails.  I couldn't take the nails directly; I had to empty the keg and take the nails once they were on the ground.  After all this, I was still unable to shoe the horse.  Maybe I need a hammer or something similar.

Continuing west down the road I was finally out of town, at a crossroads leading north and south.  The path north led to a large (and empty) field.  As I've said before, nothing in these games is ever empty, and this was no exception.  Digging revealed some yellow powder, which immediately made me think of gunpowder.  (I'm not sure why, I have no idea how gunpowder is made.  But what other powder would be appropriate in a western?)  I tried typing MAKE GUNPOWDER, only to be told "something is missing".  So I was right, I just needed to find more ingredients.

South of the fork was a ridge with a narrow ravine.  (Remember that word "narrow", it'll be relevant in a later head-slapping moment.)  I tried to go down the ravine, but the way was blocked by impassable sage brush and tumbleweed.  This was the last avenue of exploration that was obviously open to me, so it was time to take stock of what I'd already discovered and start figuring things out.  I'd only found two out of 13 treasures, which meant that I still had most of the game ahead of me.

Before I could do much investigating, though, the sun started going down, alerting me that the passage of time is important in this game.  After a while the sun went down completely, and it was too dark to see.  Moving around in the dark made me trip and break my neck, and no matter how long I waited it never got light again.  I tried sleeping in the hotel bed, and woke up the next day with the sun shining again, but obviously I'd missed something here.  I figured I needed a light source of some kind so I could explore the town at night.  I had some matches, but those only lit up for a short time.

I didn't have a light source, but remembering the matches made me think that I might be able to use them to burn the undergrowth blocking my entry to the ravine.  This worked - all I had to do was LIGHT MATCH - and with the sagebrush burnt away I could descend to the bottom.  There I found the charcoal remains of the sagebrush, and the entrance to a mine.

Inside the mine it was predictably dark, but my recent play-through of Pyramid of Doom reminded me that items are often hidden in dark areas.  I lit a match, which briefly flared and revealed a passage down, as well as a *silver bullet*.  (Werewolves?  In a western-themed game it seemed unlikely...)  Heading down into another dark area, I lit a match again and... eureka!  A candle!  I now had a light source, and could explore the mine without the risk of breaking my neck in the dark.

Alas, there was nothing to explore.  A passage south led to a dead end with no apparent purpose.  I tried digging there, but found nothing.  There was nothing to do but return to town, drop the *silver bullet* off at the store, and try to solve some other puzzles.

The first thing I tried was looking around town at night now that I had the candle.  The only thing out of the ordinary was in the saloon, where something was scared off when I entered.  A bunch of stuff flashed on the screen when this happened, but it was all too fast for me to read.  I could have tried taking a screenshot to read the flashing messages, but I figured that players in 1980 wouldn't have had that luxury.  Whatever this mystery is, I wanted to solve it as legitimately as possible.

The next puzzle I solved happened almost entirely by accident.  Frustrated after an hour of ineffectually trying things, I decided to take a look at the compass.  Normally it points north, but this time it pointed to the horseshoe (which I luckily had in my possession).  A magnet!  During the last hour I'd tried the door to the jail, which was barred from the inside, so it was fresh in my mind.  Using the horseshoe I was able to unlatch the door and get inside.

As I went inside, a ghostly voice whispered a strange message: "Don't collect $200 then don't pass go! Contrapositive."  I took the meaning of "contrapositive" to be that I should pass go and collect $200.  Typing PASS GO informed me that "I can't do that... yet!"  Something to keep in mind for later.

Inside the jail I found a *golden derringer* and a locked door.  I couldn't unlock the door (the magnet didn't work), and I had no idea if the derringer had bullets or not.  But I did have an idea of where I could try it out...

Heading east out of town, I tried shooting the snake with the derringer.  Much to my surprise, the gun shot a stream of water; not what I expected, but enough to make the snake go away.  With the snake gone I was able to dig with the shovel, creating an open grave.  Inside the grave was a *gold coin* and a purple worm.  Thankfully this purple worm was less deadly than the type from Dungeons & Dragons, or the one from Pyramid of Doom.  I was able to kill it, leaving behind some purple slime and giving me a sense of satisfaction (as well as 1 bonus point).
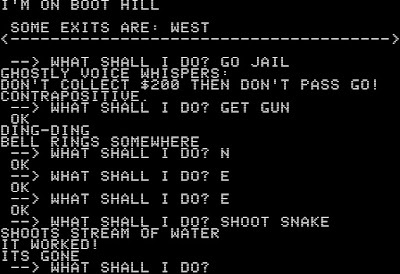
I can't imagine this ending well in real life.

I was stymied again for a while, and spent a lot of time cycling back through the same areas and trying things that didn't pan out.  My next breakthrough came at the ravine.  I'd thought that making my way down the ravine was all I needed to do in this area, but I'd missed one important piece of description: it was a narrow ravine.  I tried jumping over it, and much to my surprise it worked.  I leaped over the ravine, into a whole new area of the game.

There wasn't much here though, just an old shack with creaky floorboards and another telegraph key.  Pressing the key did nothing, so I left.  It wasn't until some time later that I registered the creaky floorboards as unusual.  Taking one of the floorboards, I uncovered an entrance into the cellar, where I found some *pelts*.  Another treasure down, seven left to go.

The problem was, this time I was really stuck.  I had plenty of loose ends: the locked door in the jail, the safe, the two telegraph keys, getting what I needed to shoe Swole Paint, the incomplete gunpowder ingredients.  The last of these is the one I solved first - I had the crystals and the yellow powder, but the final ingredient I needed was the charcoal left over from burning the ravine underbrush.  So now I had a pile of gunpowder, but no way to pick it up.  The solution here was the keg I'd found earlier, which had originally been filled with nails.  I had a keg of gunpowder, now all I needed was something to blow up.

The obvious candidate was the safe, so I took the keg to the telegraph office and dropped it there.  I had matches, but lighting one didn't seem like the wisest course of action here.  (I tried it anyway, with predictable results.)  For that to work I needed a fuse, or maybe to make a trail of gunpowder.  The game didn't seem to recognise the word FUSE, and I wasn't able to figure out a way to take a handful of gunpowder from the main pile.  Either I was missing something obvious, or I didn't have what I needed to blow up the safe without killing myself.

I eventually caved here, and looked up the answer.  I was on the right track with using the gunpowder, but the method of blowing it up was not what I'd have expected.  I needed to move the safe, thereby exposing some loose telegraph wires.  By connecting the wires and pressing the telegraph key, I could run a spark through the wires that would blow up the gunpowder.  Of course pressing the key in the telegraph office would kill me as well, but that's where the other key in the shack across the ravine came in.  By dropping the keg here, going to the old shack, and pressing the key there, I could blow up the safe.  This left the entire telegraph office as a smoking crater, with the wrecked safe lying open in the middle of the street.  Inside it was a bag of *gold dust*, leaving me with six treasures still to find.

While messing with the key in the telegraph office (after connecting the wires) I'd received a clue in the form of a morse code message: "... .... .- -.- . - --- .--. .--. . .-.".  Luckily for me I was playing this with the aid of the internet, where I was able to find a handy morse code translator; I pity the poor kids who had to figure this stuff out in the 80s from actual books with their actual brains.  The code translated to SHAKE TOPPER, which baffled me for a bit before I realised that the topper it was referring to was a hat.  Shaking the stetson I'd found earlier made a key fall out (and also made the hat fit my head properly).

The key unlocked the door in the jail, which led to a cell.  The only thing in the cell was a hammer, but I'd been looking for one of those for ages.  It was the last item I needed to shoe Profiterole Paint.  I figured that now I'd be able to ride him somewhere, but when I tried I was told that I "may need a magic word".  The first thing I tried was PLEASE, which obviously didn't work, but I had no other ideas, and there hadn't been any obvious clues.  After a bit of experimentation I tried GIDDYUP as the obvious thing you say when you're on a horse.  Asshole Paint raced off with me on his back, until he eventually bucked me off and left me in a hidden canyon next to a teepee.

Inside the teepee I found a *sacred tom tom* and a *turquoise necklace*; only four treasures to go!  The problem was, I had no obvious way out of the canyon.  With nothing else to do I ran through my inventory and started using the items I was carrying.  The sacred tom tom provided the solution, as playing it summoned an Indian ghost.  I must have really been in the stereotypical Western mindset at the time, because it didn't take me long to try saying HOW.  "Geronimo" teleported me back to the manure pile in the stable, and I was able to deposit my treasures.
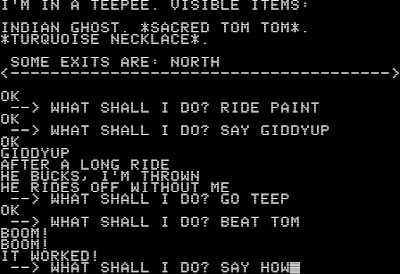
At least the game didn't ask me to smokum peace pipe.

The last few things I'd discovered had completely wiped out my list of loose ends, so I went through my notes to find anything that I hadn't found a use for, or other odd things I hadn't worked out.  There were two things on that list, both involving the saloon: the mirror, and whatever it is that runs away when I go there at night time.  The saloon ended up being the place that led me to all four remaining treasures, but I didn't work any of this out myself.  From this point on, I was completely relying on a walkthrough.  Eight years of this blog, and I'm wondering if I'm ever going to get good at these games...

The first thing I'd missed was a ghostly piano player that shows up during the day (apparently after the mysterious bell noises I've been hearing periodically).  The ghost and his piano are insubstantial, but if you clap the ghost takes a bow and vanishes, leaving his piano behind.  (I guess this is the solution to the "vain" hint, with the piano player being the vain one in question.)  Playing the piano clues you in that something is inside, and opening it reveals a map.  The following message is written on the map: "IT'S MINE, DIG ROOF!"  Aha, the dead end in the mine!  I'd forgotten all about it as a potential mystery.  I went back to the mine and used my shovel to dig away at the roof, and found a *gold nugget*.

For the next treasure, I had to wait until nightfall and go back to the saloon.  After entering (and scaring the patrons away), I extinguished my candle and then lit a match to briefly illuminate the place, which was now full of ghostly line dancers.  I danced along with them and won a prize: a *silver cup*.
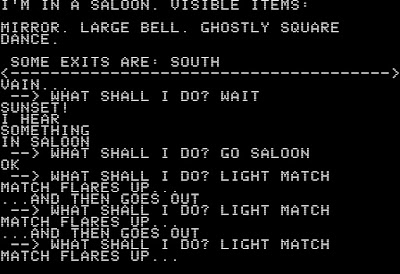
Getting a brief glimpse of the ghostly square dance. If this
is what happens in the afterlife, I choose oblivion.

The next treasure was hidden behind the mirror, but breaking it without the right preparation resulted in me being slashed to ribbons by flying glass.  I needed to tape the mirror using a roll of tape found under the bed in the hotel.  I hadn't found that tape, despite searching the bed multiple times.  What I'd needed to do was MOVE BED, which is the second time in the game I'd been stumped by the need to move things around.  By taping the mirror I was able to break it safely, and gain entrance to a hidden office.  There I found an *Oriental Go board*, and only had one treasure remaining to find.

I was able to get the last treasure on my own.  I'd been clued in previously about the need to PASS GO, so I tried it here and was rewarded with $200.  This is the second adventure game I've played that's used a Go board in conjunction with the idea of "passing go" from Monopoly.  I think the other one was Aldebaran-III.  I'm not sure that Aldebaran-III was widely played, so it's possible that Adams came up with it independently.  It is the sort of odd pun that he seems to like.

With all of the treasures in hand, all that was left to do was collect them all at the store and type SCORE.  This was my winning screen.
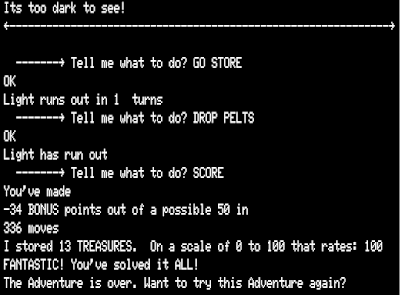
It looks like my candle had run out just as I beat the game.

Winning was satisfying, of course, but having -34 bonus points wasn't something I could stand for.  Apparently the amount of bonus points is determined by how many moves you make before finishing the game (as well as a single point for killing the purple worm in the grave).  I wasn't able to find a detailed breakdown anywhere as to how the points and moves correlate. I ended up using a walkthrough with a solution, because I really couldn't be bothered sitting down to figure out an optimal path on my own.  Here's my completely unearned total victory:
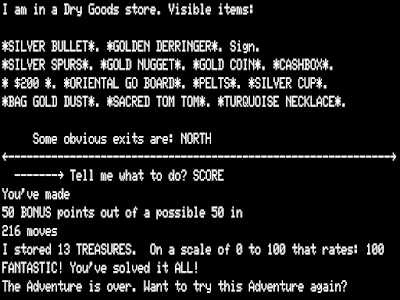
I've solved it ALL, except the bits I didn't!

Having more or less finished Ghost Town, it feels like a more satisfying experience than most of Adams' other games.  The puzzles are difficult without being unfair (I was too quick to get help with the answers at the end), and it sticks to its theme throughout.  Another solid effort from Adams, who has been nothing if not consistent.

THE RADNESS INDEX:

Story & Setting: The treasure hunt plot isn't going to score highly, but I like the Western ghost town setting.  It sticks to its theme well, with only a moment or two that break the verisimilitude (I'm thinking mainly of the water pistol derringer here).  Rating: 2 out of 7.

Characters & Monsters:  There are various ghosts about, as well as a snake, and 'Ole Paint.  As usual with Adams, they're all obstacles with little in the way of personality or possibilities for interaction. Rating: 1 out of 7.

Aesthetics:  Come on now, you know how this works by now.  It's a text adventure. Rating: 1 out of 7.

Mechanics:  Another mechanically sound effort from Adams.  His parser does the job, but it's still very simplistic.  Rating: 4 out of 7.

Puzzles: There were some genuine headscratchers in this one, but they all made sense in their own way.  I especially liked the whole sequence required to blow up the safe: it's involved, but every step makes sense.  My only complaint is that certain puzzles (especially saying HOW to the indian ghost) are easier if you have a familiarity with the kinds of Western stories that were common circa 1980.  I grew up watching those movies, so for me it wasn't much of a problem, and I doubt it would have been for anyone when the game came out.  Those Western cliches have very much gone out of style, but it's hard to criticise a game for expecting knowledge that was ubiquitous at its time of release.  Rating: 4 out of 7.

Challenge: I feel like this one was balanced pretty well, with a variety of puzzles and no frustrating random elements.  The bonus points are also a nice optional challenge for those who want to try beating the game faster.  I'm a little disappointed in myself for giving up on beating this game legitimately near the end; I feel like these were all puzzles I might have figured out eventually.  Rating: 4 out of 7.

Fun: Aside from The Count (Adams' best game) and Adventureland (a genre that's right in my wheelhouse), I think I enjoyed playing this more than any of Adams' other games.  Something about the setting and the nature of the puzzles came together for me, and it also didn't have any annoying early bottlenecks.  It's a primitive text adventure, so there's only so high this rating can go, but the process of working this one out was enjoyable.  Rating: 3 out of 7.

Bonus Points: 0.

The above scores total 19, which doubled give Ghost Town a RADNESS Index of 38. That puts it just above Adventureland, Adams' very first game.  I probably enjoyed Adventureland more, but if I'm being honest that game has a bunch of annoying random elements that drag it down.  I'm happy enough for Ghost Town to sit second out of all Adams' games, with only The Count ranking higher.

NEXT: It's time to go back to the dunjon, with the latest Dunjonquest installment, Morloc's Tower.

Sunday, July 17, 2022

Priority Adventure 7: Zork: The Great Underground Empire (1980)

For long-time readers of the blog (or those who've gone back through the archives), this post might give a sense of deja vu.  After all, I have covered Zork before, way back in the dim dark days of 2016 (the so-called "worst year ever" until every year after proved to be successively more horrible).  The version I covered at that time was the original developed for the PDP-10 mainframe at MIT, or the closest I could get to emulating that version.  Today I'm covering the game in it's most iconic, recognisable form: its commercial release as Zork I: The Great Underground Empire.

But first, a little history refresher.  After Colossal Cave Adventure became popular at MIT, four students (Dave Lebling, Tim Anderson, Marc Blank and Bruce Daniels) decided to create their own game in the same style.  They developed it from 1977 to 1979, and it proved extremely popular.  After graduation, three of the game's creators (Lebling, Blank and Anderson) went on to help found Infocom as a software development company.  The three of them convinced the other founders that Zork could be sold commercially, and the game's eventual success changed the entire direction of the company.

In the original game, the goal was to explore the Great Underground Empire in search of 31 treasures.  Finding all of the treasures allowed entry to the Tomb of the Unknown Implementer, and an end-game gauntlet of puzzles that led to a fantastic treasury.  The game ended with the player being forced to assume the role of the Dungeon Master, who must oversee the dungeon and its trials.  The complete Zork was far too large for release on home computers, so the development team gradually cut it down into a smaller game.  This game was released late in 1980 for the TRS-80, then on the Apple II in 1981 (followed by every computing platform known to man in later years).


The initial release of Zork was distributed by Personal Software, and features some artwork of dubious accuracy.  The white house and the mailbox are on point, but the hulking barbarian is a far cry from the adventurer of Zork, at least as I imagine him.  The manual that came with this version was quite extensive at around 30 pages, but mostly focuses on introducing the player to basic text adventure concepts, with little in the way of lore.


By 1981 Infocom had taken control of its own packaging, and this saw the debut of the classic cover that most of you should recognise.  Early releases of this cover featured the same manual as before, but eventually the game would come with a booklet entitled The Great Underground Empire: A History (the version I found has a copyright of 1984).  It's written in Infocom's customarily humorous style, and presents a history of the kings of Quendor, the empire which formerly ruled the lands where Zork is set.  In brief, the war-like king Duncanthrax, after conquering everything he could on the surface, decided to expand his empire below ground, hiring the Frobozz Magic Construction Company to undertake the project.  The work would be continued by his great-grandson, Lord Dimwit Flathead the Excessive, who commissioned a number of large and pointless projects (including the Flood Control Dam which appears in the game).  That this was all written years after Zork's development should tell you how relevant it is to the game itself, but it's amusing enough to be worth a read anyway.

I replayed Zork earlier this year (April, which means I've nearly caught up to the present day), choosing the Apple II version.  It didn't take me long to breeze through, because I pretty much know all of this game's puzzles by heart.  Playing this game is almost like being on autopilot for me, so I have no memory of the order I did things, or what my mental process was like at the time.  There probably wasn't any mental process at all.  So instead of going through the game beat by beat, I'm just going to run through all of the treasures and where they're found, with a focus on what's changed from the original game.

The iconic beginning.

The game begins in front of a white house, with the player standing next to a mailbox.  The mailbox contains a leaflet welcoming the player to Zork.  The surrounding forest hasn't changed from the original, still featuring a grate hidden under a pile of leaves, a tree with a nest containing a jewel-encrusted egg, and a canyon leading to the end of a rainbow.  The house inside is also much the same: a kitchen with a water bottle and a sack (containing garlic and some lunch); a dark attic with a rope and a knife; and a living room where the player finds an elvish sword, a lantern, and an empty trophy case to store any treasures they find.  The original version had a couple of extra items: a newspaper reporting on recent updates to the game, and a clay brick in the attic.  The newspaper's obviously no longer needed, as the game's no longer in active development, and the puzzle involving the clay brick has been cut (more on that, and other cut content, below).

Also in the living room is a trapdoor hidden beneath a rug, which leads to the Great Underground Empire.  This is where the vast majority of the game's treasures are found, and as I said above I'm going to run through them all to give a sense of the game.  If I don't mention any differences from the original game, assume the treasure is obtained in roughly the same way in both versions.

1. Jewel-Encrusted Egg: This is found in a tree not far from the white house, and is likely to be the first treasure the player will find.  In a devious touch, it also happens to contain one of the last treasures the player is likely to find.  See the Clockwork Canary below.

2. Beautiful Painting: The path south of the entrance to the underground leads to an art gallery, where this painting is found.  There's also a shaft here leading back up to the house, but the player can't squeeze through while carrying more than two inventory items.  It's a quickly discovered way back to the surface, but an inconvenient one for someone who's found a lot of treasures.

3. Bag of Coins: North of the entrance to the underground is a hostile axe-wielding troll, who will have to be dealt with violently.  (Zork has a couple of combat encounters, the outcomes of which are randomly determined.  The player is more likely to succeed the more treasures they've found, but the troll is met much too early in the game for the player to have gotten any stronger.  Luckily the elvish sword is usually enough to kill it.)  West of the troll is a "maze of twisty little passages, all alike", which can be mapped by dropping items. (I must admit, this time around I just used a map I'd made years earlier.)  Found in the maze is the skeleton of a former adventurer, and on its body is a rusty knife, a useless lantern, a skeleton key, and a bag of coins.  The coins are a treasure, and the key unlocks a grate  in the maze that leads back to the surface.  (This adventurer was supposed to be the protagonist of Colossal Cave Adventure, something that I guess wouldn't have been as obvious to home computer players as it was to the mainframe users at MIT.)

In combat with the troll.  They've cleaned out the seemingly meaningless
string of numbers that appears every round in the mainframe version

4. Platinum Bar: Not far east of the Troll is a room that's so loud you can't concentrate to take any actions; everything you try just results in your command being echoed back at you.  There's a platinum bar here, but the noise means you can't pick it up.  I've always beaten this puzzle by using the ECHO command, which then allows you to act as normal.  It's somewhat nonsensical, but shouting "echo" when there's an echo is something people do in real life, so I appreciate the designers acknowledging it.  Apparently the noise is coming from the Flood Control Dam above, and you can also stop the noise by messing around with the dam, but I've never tried it that way.

5. Torch: Not far from the Loud Room is a room with a deep shaft and a railing.  You can tie a rope to the railing and climb to the bottom, where you'll find an ivory torch that is always lit.  This item fixes the problem of your lantern having a limited battery, but it's also liable to be stolen by the thief if he wanders past.  (Speaking of the thief, his tendency to move items around made this one of the biggest problem areas of the original version of the game.  If you left the rope tied to the railing, he'd almost certainly wander by, untie it, and leave it at the bottom of the shaft where you could no longer get to it.  It's needed for a later puzzle, so if this happens you can't win the game.  In Zork 1 you only need the rope to climb down this shaft, so if this happens it's not such a big deal.)

6. Gold Coffin: South of the Torch Room is a Temple, an Altar, and an Egyptian Room where you find a gold coffin.  In the original game this coffin's in an entirely different area, and due to its size and weight it takes a bit of rigmarole to carry it back to the trophy case.  In Zork I you just need to pick it up then go pray at the nearby altar to be transported to the surface.

7. Sceptre: The sceptre is inside the coffin.  I don't think this treasure is in the original game.

8. Pot of Gold: If you take the sceptre to the end of the rainbow, you can WAVE SCEPTRE and the rainbow becomes solid.  A pot of gold also appears at the end of the rainbow.  This puzzle is in the original game, but instead of the sceptre you have to wave a magic wand which looks like a normal stick.  Once the rainbow is solid you can use it to get to the top of the nearby waterfall.

9. Crystal Skull: Back at the Temple and Altar you'll find a brass bell, a book, and some candles.  Not far from there is a gate to Hades that's blocked by the spirits of the dead.  To get by the spirits you need to ring the bell, light the candles (using matches from the Dam), and read from the book.  This lets you pass through the gate into Hades where you'll find a crystal skull just lying around.  In the original game this gate leads to the Tomb of the Unknown Implementor, which eventually opens to reveal the end-game trial that's been cut from Zork 1.  There's no crystal skull in the original game either.

10. Trunk of Jewels: Getting this treasure requires operating Flood Control Dam #3.  To do this you need to figure out the right buttons to press in the dam's control room, and activate the control panel with a wrench.  This activates the dam which lowers the water level of the river so you can cross.  You can also then take the trunk of jewels, which is embedded in the river floor.

11. Trident: The crystal trident of Poseidon is just lying around to the north of the river, and you can easily take it once you've activated the dam and crossed over. Alternatively you can use a mirror situated not far from the entrance to Hades: touching it teleports you to another mirror near the Trident Room.

12. Jade Figurine: Not far from there is a room with a Giant Bat guarding a jade figurine.  The bat will grab you and dump you somewhere in the nearby Coal Mine, but if you're carrying some garlic it will leave you alone and you can take the figurine.

Being carried away by the bat, with a reference to Hunt the Wumpus.

13. Sapphire Bracelet: This bracelet is between the Bat Room and the Coal Mine, in a room filled with gas.  Taking the ivory torch or a lit candle into this room results in a fatal explosion, but the lantern is safe.

14. Diamond: At the end of the Coal Mine maze is a strange machine that can only be turned on if you're carrying a screwdriver.  Getting into this room requires squeezing through a narrow crack, which you can only do while carrying one item.  Unfortunately it's also dark in this area, so you need to bring a light source through as well as the items required for the machine.  This is done via a basket that can be sent down from an area above.  With all of this done, you then need to place a piece of coal in the machine and activate it to turn the coal into a diamond.

15. Jeweled Scarab: To get this item you first need to find the boat at the base of the dam, then inflate it using an air pump found across the river.  Any sharp items in your inventory will cut the boat open, so you need to be careful before getting in and riding it downstream on the river.  After a while you can disembark on a beach on the east bank and dig to find the scarab.  In the original game, this item is a statue.

16. Large Emerald: Further down the river is a buoy that's there to warn you that you're about to go over Aragain Falls.  If you take the buoy with you and open it up you'll find an emerald inside.

17. Silver Chalice: Deep in the maze is the lair of a Cyclops, which can be put to sleep with some food and water (or scared away with the name ODYSSEUS, but that solution's a little more obscure).  Up above the Cyclops' lair is the hideout of the Thief.  He'll show up to defend his home, and you'll have to beat him in a straight-up fight.  If you try this early in the game there's little chance you'll win, but once you've obtained a decent number of treasures and racked up a good score you'll be able to kill him.  In his lair you'll find the silver chalice, as well as any other treasures he's nicked off you during the game.

18. Clockwork Canary: But wait, don't kill that Thief too quickly...  First you'll need to make sure he steals the jewel-encrusted egg from you, because he's the only one who's skilled enough to get it open.  Inside the egg is a clockwork canary.  (Make sure to take the canary out of the egg before putting it in the trophy case, otherwise it won't register as a treasure.  I forgot about this, and it took me ages to figure out why the game wasn't acknowledging that I had all of the treasures.)

19. Brass Bauble: To find the bauble you need to take the clockwork canary into the forest and wind it up.  The canary's song will summon a bird that drops the bauble at your feet.  There are some birds singing occasionally when you go through the forest, which is definitely a clue, but this is one of the more obscure puzzles.

20. Ancient Map: Once you've placed the previous 19 treasures in the trophy case, an ancient map will appear.  This map leads outside to an old stone barrow, which you enter to beat the game and progress to Zork II.  This map isn't in the original game, as it has an entirely different end-game.

Following the map to the stone barrow. I forgot to screenshot
this when I played through, so I nicked this image from
gameingafter40.blogspot.com

Going back over Zork I and comparing it to the mainframe version, I'm impressed at how much of the game they managed to fit into a home computer release.  The entire overworld is present, as is the bulk of the underworld, albeit rearranged and streamlined somewhat.  The areas that haven't been included are the ones that are harder to get to, and the ones containing the most difficult puzzles.  I'll do a quick run-down of what was cut below:

  • The Bank of Zork is gone, which is just as well because I never quite figured out how it works.  I guess I'll get to refamiliarise myself with it when I get to Zork II.
  • The whole volcano shaft and the hot air balloon is gone.  In terms of timing it's one of the more complex sequences in the original game.  his is where the clay brick explosive I mentioned earlier came into play.
  • The area with the four cakes where you have to eat one to shrink down has been cut.
  • The nearby area where you have to control a robot to free yourself from a trap is also gone.
  • The puzzle with the three interconnected crystal balls is gone.  This means that you no longer need to use the rope and timber to suspend yourself halfway down the coal mine shaft in order to access a secret room.  This was one of the cleverer puzzles of the original, but also one of the fiddliest, so I can't say I miss it.
  • The entire end-game trial is gone, and as I recall has been moved to Zork III.
  • There's no "last lousy point", which was earned by sending away for a brochure and receiving a stamp that featured a dig at Colossal Cave Adventure's creator Don Woods.  It's a shame, because I love the gag, but the in-joke wouldn't play as well on home computers as I assume it did to the mainframe users who were familiar with Zork's predecessor.

That's pretty much all the major material that's been cut from the game, which isn't a whole lot.  Of course this is just what I recalled from skimming my maps from years ago, so I could be missing something.  Most of this material was moved to Zork II, with just the end-game trial being moved to the third game.  I'm much less familiar with the latter two parts of the trilogy, and I'm looking forward to revisiting them to rediscover what's been added around the existing puzzles.

I heartily enjoyed going back to Zork I, but I know the game so well that it hardly counts as playing it.  Instead of being a challenge it's like a nostalgic walk through an old neighbourhood, albeit one where I might be murdered by a nasty Troll or a sly Thief.  But the atmosphere and idiosyncratic humour of the game are so good that I always enjoy going back, and I'm sure I'll do so again a few years down the track.  I expect this game to do exceptionally well on the RADNESS Index.

RADNESS INDEX:

Story & Setting: The mailbox, the white house, Aragain Falls, Flood Control Dam #3, the maze of twisty passages, all alike...  The setting here is iconic, and the couple of asides about the fall of the Empire give it just a touch of history and wonder.  The treasure hunt story is nothing special, but as an excuse to explore the Great Underground Empire it does the job. Rating: 4 out of 7.

Characters & Monsters: The Troll, the Thief, the Cyclops and the Bat are pretty much it.  Most of them are simple puzzle or combat obstacles, but the Thief is something else entirely.  He has personality, he has an agenda, and he has the ability to make you hurl expletives at your monitor.  As I said when I played the mainframe version, the Thief is the single greatest villain in gaming up to that point.  As of Zork I's release in 1980, I still believe that's true.  Rating: 4 out of 7.

Aesthetics: It's an old-school text adventure, but due to the enjoyable writing this one's going to score about as high as a text adventure of the era can score.  Rating: 3 out of 7.

Mechanics: I don't know if I mentioned it the first time around, but the Zork parser runs really smoothly.  Perhaps it's just my familiarity with the game, but I hardly ever run into issues with finding the right command, and that can be one of the biggest stumbling blocks for this genre.  It also accepts some quite complex commands, especially in comparison to its contemporaries that are usually restricted to two words.  I might be rating this one a little high, but it's the parser that all others are measured by.  Rating: 5 out of 7.

Puzzles: It doesn't have the difficulty of the mainframe version, but the puzzles in this game have been tightened up, and the most irritating ones have been completely cut.  The difficulty ranges from dead simple to devious, but there's nothing here I'd classify as unfair.  Rating: 5 out of 7.

Challenge: Zork I is a tough game to crack, but with persistence it can be done without the need for a towering intellect (i.e. I was able to do it without help about a decade ago).  I especially like that it begins with loads of simple puzzles, and saves the really hard ones for later.  There's always something else to try in Zork, even when you feel like you're stuck.  There are random elements that can kill you off, but the most likely of these is the Troll, and he's encountered right near the start.  A hard game, but a fair one, and about as well-judged as any adventure game I've played. Rating: 6 out of 7.

Fun: I always enjoy going back to Zork, so there's going to be an amount of bias in this score.  But let me be real with you, this category is kind of bullshit, and represents nothing more than my own  personal enjoyment of a game.  Zork's one of my faves, but it's not one of my all-time faves, and there's only so much you can get out of most adventure games once you've explored what they have to offer.  It's hard to go past this one though, as it's one of the most enjoyable of the era.  Rating: 6 out of 7.

Bonus Points: 2. Iconic, influential, and it still holds up.  A masterpiece.

The categories above total 33, which doubled comes to 66.  Add the bonus points, and Zork I scores a  whopping RADNESS Index of 68. That's the highest rated game on the blog so far.  The mainframe version is second on 64 points, which makes sense to me.  The mainframe version might have more packed in, but Zork I is more focused, with a tighter environment and an emphasis on the exploration and puzzles that worked best from the original.  Funnily enough, taking out the more frustrating parts of the original made for a better game.  I doubt I'll ever go back to the mainframe Zork, but there's no question of whether I'll return to Zork I.

NEXT: It's back to Scott Adams territory, as I put on my old west prospector's hat for Ghost Town.

Wednesday, June 29, 2022

Priority Adventure 6: Pyramid of Doom (1979)


Pyramid of Doom is the third game in a row on the blog from Scott Adams' Adventure series, which I realise could be getting a little tedious.  I'm trying to catch up on the games I played last year when I thought the blog was dead for good.  There'll be a little more variety going forward, I promise.

Despite this being part of his eponymous series, Adams only co-wrote this one. It's mostly the work of Alvin Files, who I can't find much about. According to Wikipedia he reverse-engineered Adams' games to write Pyramid of Doom and submitted it to Adams himself.  Adams made some tweaks (so he gets a co-creator credit) and released it as part of his series.

We're back in familiar territory here, with the goal being to loot a pyramid of 13 treasures.  I was convinced that Adams had made a game like this already, but I was getting mixed up with King Tut's Tomb by wonder-child Greg Hassett. Given the frequency of the treasure-hunting theme in these early adventure games, it's surprising that there have only been a couple of Egyptian-based games.  It seems like a natural fit.

I originally played this game in September and October of last year, but I remember almost nothing about it.  I've probably said this before, but blogging through a game really helps to cement it in my memory, especially for short games that can be played through in a couple of hours.  Those games go through my head so quickly that I might as well not have played them at all, but having to actually think and write about them makes the stick.  It's one of the things I find most valuable about the blogging experience.

The earliest versions of Pyramid of Doom were released on the TRS-80 and Apple II.  The first time I played it was the TRS-80 version, but I'm switching to the Apple II for this revisit.  Alas, my non-existent memory means that I won't be able to write about any differences between the two versions: the Ports of Call section is one of the things that's probably going to disappear from the blog due to lack of time.

Beginning my quest.

I start the game standing in the desert next to a pool of water, with a wooden pole embedded in the ground nearby.  As usual, I began by typing the same three commands: SCORE, HELP and INVENTORY.  SCORE told me that I'd found no treasures, giving me 0 points of a possible 100.  HELP responded with the advice to "search and ye shall find".  Thanks a bunch Scott and/or Alvin, I'd never have figured it out.  INVENTORY revealed that I was carrying an empty canteen and a flashlight.  This worried me a bit, as I thought I might have to deal with a finite light source as well as thirst.  Thankfully neither became a problem.

The initial desert region was small, only four areas: the opening one with the pole and liquid, two apparently empty areas, and an area next to the titular pyramid.  In the initial area I was able to fill my canteen with water, and also take the pole (which was actually a shovel embedded in the sand).  I was also able to enter the pool of liquid, where I found a large key at the bottom.

The area directly north of the starting area was just empty desert, and the same was true of the area to the north-east.  Digging in both of them revealed a tiny key in the north-east area.

East of the pool was the area next to the pyramid.  There was no obvious way inside, but there was a sign and a stone nearby.  The sign warned me that "he who defiles the tombs of Egypt shall surely perish", which is definitely accurate as I died many times during this quest.  The stone was covered in strange markings, but I couldn't read the message because it was incomplete.  I was able to take the stone with me, revealing a large locked door.  (It's not clear how, as the stone is hardly big enough to conceal a door if I can take it with me.  Let's assume it was holding down a pressure plate or something.)  The large key fit the door, but when I tried to go through I was crushed by a large stone.  I needed to find a way to disarm this trap before I could start exploring the pyramid.

Crushed by a falling stone.

I hadn't tried digging next to the pyramid yet, and when I did it created a hole.  At the bottom of the hole was a tiny locked door, which I was able to open with the tiny key.  I was too big to get inside, but when I opened the door there was a sound like machinery.  Sure enough I was now able to safely enter the pyramid, so I guess opening the tiny door disarmed the trap.

It was dark inside the pyramid, but my flashlight was a simple solution to that problem.  (A lot of adventure games of this era take inspiration from Colossal Cave and Zork by giving the player's light source a finite lifespan, but Pyramid of Doom mercifully refrained.)  I was in a rocky entrance-way, where I found a pistol and some mouldy bandages.  (I never did find a use for the bandages. Perhaps they're just there as a clue to the presence of a mummy, although this game being set in a pyramid was already a bit of a giveaway.) There was also a closed sarcophagus, and exits to the north and south.  The sarcophagus opened onto a staircase leading down, but I decided to ignore that for now and explore to the north.

It was at this point that a small nomad appeared and started following me around wherever I went.  He wasn't an obstacle or impediment as such, but he was annoying enough for me to try killing him with my bare hands.  Alas, I was informed that it wouldn't work, so it looked like I was stuck with this guy for a while.  I figured he might come in handy later, but to be honest I was hoping to be able to get rid of the nuisance as quickly as possible.  That was when I remembered my pistol, and gleefully shot him.  He disappeared in a puff of smoke (like the dwarves from Colossal Cave Adventure), which was very satisfying.  If I needed this guy, I was going to have to find out the hard way.  (A look at my inventory revealed that my gun had 3 bullets remaining.  The nomads keep popping up as you play, and it's possible to run out of bullets and get stuck with one following you.  I never did find a purpose to these guys though.)

Heading north from the entrance, I passed through a dining room with a table, then east into a room that was dominated by a giant oyster.  The oyster was blocking an archway beyond, and none of my attempts to move, kill or open the oyster were successful.  There was a flute on the ground, but playing it had no effect.  I took it with me and explored south of the entrance.

I entered a sitting room, with a fireplace, ashes and a basket.  Looking in the fireplace I found a lump of coal.  My immediate instinct was to wash the coal, as I'd encountered similar puzzles in games before; doing so revealed that the coal was a *ruby*, denoted as a treasure by the surrounding asterisks.  Looking in the ashes revealed a *gold necklace*, yet another treasure.  I was on a roll!  Looking in the basket wasn't quite so fruitful, as I was confronted by a hissing cobra.  Playing the flute I'd found earlier caused the snake to open a secret passage behind the fireplace and slither away.

The cobra opens a secret passage.

Through the passage was a sloping crawlway, where I was confronted by starving rats. With no food to give them, I tried shooting, and the noise scared them away.  Unfortunately they weren't gone completely, they'd just fled north, into a room with a blood-stained altar.  This time the rats attacked and killed me, and I was forced to restore a saved game.  Heading back through the crawlway I ignored the rats, heading north without disturbing them.

There was nothing obvious I could do with the altar (the game didn't recognise PRAY or SACRIFICE as verbs), so I took a passage east into a hieroglyphics room.  On the floor was some dried camel jerky, which I took, thinking it might possibly be food for the rats.  The hieroglyphics said "LEAVE *TREASURES* HERE!", so I'd found the all-important location to store my ill-gotten gains.  (I later discovered that the hieroglyphics are incomplete, and you need the stone from outside the pyramid to read them. I'd been lucky enough to have it with me the first time I went in there.)

Dropping the gold necklace increased my score to 7, but curiously dropping the ruby didn't increase my score at all.  I kept a note of this oddity, because small details like that can prove to be very important in these kinds of games.  I was pretty sure the ruby was needed for another puzzle deeper in the game, but for now I left it in the treasure room for later.

Heading south from the altar, I fed the rats with the jerky.  This satisfied them, and I was able to take the rats with me.  Heading back north from the altar led to the room with the oyster, presumably through the arch.  The urge to feed the rats to the oyster came over me, but that didn't work.  Later, when I was trying different things to open the oyster, I tried feeding the jerky to it instead of the rats.  The oyster ate the jerky and opened up, revealing a *black pearl*.  It also allowed me to pass through the arch freely, back to the altar room.  This path safely bypassed the rats, so I was happy enough to ignore them for now.  By the time I tried this I was close to the end of the game, so I wasn't all that concerned as to whether feeding the rats was necessary.

I'd fully explored the ground floor, so it was time to enter the sarcophagus and go downstairs. The stairs led to a burial room, where I found an *antique tapestry* and some burning tanna leaves. More importantly, there was a fearsome mummy who was stopping me from taking the tapestry. I tried to shoot the mummy, but it didn't work, and the mummy strangled me to death.  One restored game later, I returned and tried burning the mummy with the leaves, but they were too hot to take.  There were exits leading north and south, so I decided to high-tail it and deal with the mummy later.

The north passage led to a bricked-up doorway, with a rope on the floor.  I couldn't get through the door, so I took the rope and ran back south past the mummy.  This led to a tall room with a metal bar protruding from the ceiling.  On the floor were a saw and a decapitated skeleton.  I couldn't reach the bar, and nothing I tried worked on the skeleton.  There was little I could do except go back north, and try to deal with the mummy.

With no other bright ideas, I resorted to the standard adventure game technique of looking at my inventory and seeing what might work.  It took me entirely too long to try pouring water on the leaves, but this worked, and put the mummy to sleep.  Now I could take the tapestry, which revealed a hidden alcove.

Putting the mummy to sleep.

Inside the alcove I found a chopping block, a skull, and a box.  Looking at the skull revealed some *gold teeth*, and inside the box I found some bones and an iron glove.  The obvious thing to do was reattach the skull to the decapitated skeleton, and when I did so the skeleton leapt up, pulled on the metal bar I couldn't reach, and lowered a ladder.  The skeleton, now glowing, stayed behind, but I couldn't get it to respond to anything.

The ladder led to a "revolving cavern", with exits to the north and south.  North was a prison cell, with a dead explorer chained to the wall and a pile of rubbish.  Looking around I found a *gold pin* on the explorer, and a *jade carving* in the pile of rubbish.  There was also a closed portal; opening it caused a purple worm to enter the room.  On the next move the purple worm devoured me; I suspect some Dungeons & Dragons influence here, as the purple worm is a D&D monster with the ability to swallow creatures whole.  Reloading my game, I decided to leave that portal closed for now and explore elsewhere.

Feeding myself to the purple worm.

South of the revolving cavern was a narrow ledge, where I found a *sapphire*.  Far below was a pool of liquid (acid, as I fatally discovered when I tried jumping in), and above was a hole in the ceiling.  I couldn't reach it, but throwing the rope worked.

Climbing the rope, I emerged into a throne room with a lot going on.  Seated on the throne was the iron statue of a pharaoh.  There was also a chain hanging from the ceiling, a wall mural, and a chest.  The mural revealed a clue when I looked at it: "SEEK YE WELL THE HEART OF IRON".  Next I tried pulling the chain, which resulted in the statue standing up with a hollow laugh.  Pulling the chain again revealed a spiral staircase, but it was too late, as the advancing statue tore me apart.  I returned and tried to open the chest, but the statue wouldn't let me do that, either.  I figured I'd need to locate this "heart of iron" before I could do anything in this area.

Before that, I had other things to mess around with.  Among my various fruitless endeavours I tried cutting the table with the saw, only for a *diamond necklace* to fall out.  I hadn't expected this to work, I just thought I'd try the saw on the only wooden object in the game.  The only other obvious place to go was the bricked-up doorway.  I figured this one out through process of elimination: what items hadn't I used yet?  The answer was the iron glove, which I used to punch through the bricks (badass).

Beyond the door was a hall of mirrors, which reflected my flashlight to the point where it was so blinding that I had to shut it off.  I was still able to move around, and heading north, west or south took me back to the bricked-up hallway.  Heading east led to a dressing room, where I found a *gold scarab*.  I suspected there might be more to this puzzle than I'd discovered, but my initial impulse to break the mirrors resulted in 1,000 years bad luck in the form of a cave-in.  I decided to leave this, and focus on the heart of iron.

I was stumped at this point, and had gotten to the point where being done with the game was more enticing to me than figuring it out on my own.  I looked up a walkthrough, and learned that the heart of iron was the ruby I'd uncovered earlier.  I should have been able to figure this out; after all, I'd already spotted that it wasn't a proper treasure.  But like I said, I'd reached the point of the game where I just wanted it done.  To get rid of the iron statue I needed to throw the ruby into the pool of acid below the ledge.  Once this was done, the statue melted into a pool of slag, and I could get to the treasures it was guarding.

Getting vengeance on the iron statue.

The chest opened without any trouble, and contained a *platinum crown*.  The spiral staircase from the throne room led to a treasure room, with a barred window and a locked coffer.  The coffer could be unlocked by the small key found way back at the beginning, but when I did a poison needle killed me.  Wearing the iron glove allowed me to survive this trap, and take an *emerald bracelet*.  The window bars could be cut open with the saw, and a *platinum bar* was found outside, on top of the pyramid.

At this point I'd found 12 treasures, which was one short of the full amount.  As I was nearing the end of the game, and I'd already cheated once, I succumbed to the urge to use a walkthrough and be done with it.  The last treasure was a gold coin, which was found in the hall of mirrors.  With no light source usable in that area, the only way to find the coin was to FEEL.  It's a puzzle I've encountered a couple of times in adventure games already, so I should have thought of it.  Alas, I'm much more likely to try to think my way through things at the start of a game than near the end.

Winning Pyramid of Doom

Pyramid of Doom doesn't do anything outside of the box, but it does provide a solid experience and I expect it to do reasonably well on the RADNESS Index.  It should score comparably with Scott Adams' games, which would make it a cut above the standard fare of the day.

RADNESS Index:

Story & Setting: The Egyptian-themed setting is strong at the beginning, but weakens a little towards the end as things get somewhat unfocused.  The latter stages feel more like standard D&D than Egypt, what with the purple worm and the iron statue with its ruby heart.  To the game's credit, the levels of the pyramid get smaller the further up you go, just as they would in real life. As for the story, it's yet another treasure hunt.  I get why they're so prevalent, but boy they are prevalentRating: 2 out of 7.

Characters & Monsters: This one has a number of enemies that must be defeated: the mummy, the purple worm and the iron statue being the most prominent and memorable.  There's also the string of desert nomads which follow you around, serving no apparent purpose except to provide a persistent nuisance for you to waste bullets on.  There's a decent variety here, but none of these creatures can be interacted with to any great extent.  Rating: 1 out of 7.

Aesthetics: Text adventure, terse writing, no graphics or sound. Rating: 1 out of 7.

Mechanics: The game runs adequately, and I had no glitches or major problems wrangling with the parser.  I object somewhat to the game not recognizing EXAMINE as a command, but LOOK still works so it's a minor quibble.  Rating: 4 out of 7.

Puzzles: This game plays fair for the most part, with the majority of its puzzles making sense, or being doable with a little trial and error.  I wouldn't have minded some more clues for the ruby heart puzzle, but I don't think it's absurdly difficult (especially if you've noticed that it's not really a treasure).  Rating: 3 out of 7.

Challenge: With fair puzzles and not a lot of random elements that can kill the player, Pyramid of Doom presents a reasonable challenge for the kind of game that it is.  Of course, it's an old text adventure, and even the best of those have their frustrating and annoying elements.  Rating: 3 out of 7.

Fun: It's a decently enjoyable text adventure, but there's a limit to the amount of enjoyment I can eke out of one of these things.  Rating: 2 out of 7.

Bonus Points: 0.

The above scores total 16, which doubled gives it a RADNESS Index of 32.  Nothing special, but it does stand alongside Adams' games, which is a good debut effort for Alvin Files.  I don't think Files made any games other than this, which is a bit of a shame.  Reverse-engineering the Scott Adams engine is somewhat impressive, and I'd like to see what else Files could have done with it.

NEXT: My next game is Zork: The Great Underground Empire, which I might be able to polish off reasonably quickly.  I've already covered the mainframe version, and this cut down adaptation for home computers is a game that I have practically memorised.  Always good to go back to though.

I should also mention that I've updated the sidebar with a page titled "Priority List and Chronological List".  This replaces my schedule for 1979, since I've abandoned the Chronological List for the moment.  If you want to know what games are coming up, that page has the answers. (Spoilers, it's a lot of Scott Adams adventures and Dunjonquest RPGs...)

Tuesday, May 24, 2022

Priority Adventure 5: Mystery Fun House (1979)

Blatant IP theft was much easier to
get away with in 1979


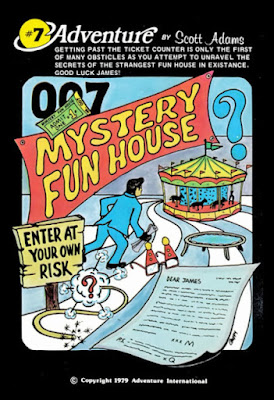
My catch-up run of Scott Adams adventures continues with his seventh game, Mystery Fun House.  The cover above indicates that this is another spy adventure, a genre that Adams has already tackled with Secret Mission.  And not only is it a spy adventure, it's one where you apparently play James Bond, agent 007 himself.  Did Scott Adams actually pay for the rights to use the potentially lucrative Bond franchise in his game?  Hahaha it's the computer game industry in 1979, what do you think?

Unfortunately, none of the above is readily apparent if you're just playing the game.  Boot up Mystery Fun House and you're seemingly a regular shmoe standing in front of the titular funhouse with no way to get in.  There's nothing to indicate that you're Bond, that you're a spy, or even what your mission is.  As you'll see, discovering what your mission is won't happen until you figure out a certain puzzle; this could happen early on, or it could happen right near the end.  For some players it might never happen.  Ah well, at least it's not another treasure hunt I guess.

Mystery Fun House was initially released in 1979 for the TRS-80 and the Apple II.  I played it almost a year ago on the TRS-80, but for this replay I've switched to the Apple II version.  I think I'll be playing the Apple II versions of these games going forward, if only for my own peace of mind.  I have grown sort of fond of the TRS-80 aesthetic, but getting games to run on that emulator can be a real pain.

The Man That Be Holdin' Gum

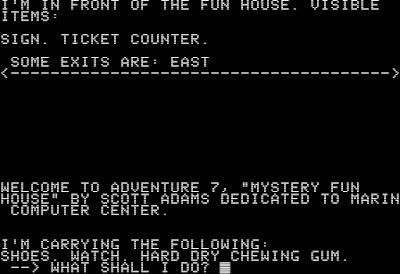
The game begins in front of the funhouse, with a ticket counter and a sign that read as follows: "PARK CLOSES AT MIDNIGHT. SHOES REQUIRED AT ALL TIMES. MANAGEMENT NOT RESPONSIBLE FOR ACCIDENTS!! CAUTION THIS PARK IS DANGEROUS!"  I was carrying some shoes, a watch, and some hard, dry chewing gum.  SCORE didn't bring up anything, and HELP simply told me to "try examining things".  Examining my watch told me that I had 595 turns until midnight, so the game had a hard limit. Time to get cracking.

Trying to enter the funhouse got me kicked out by a bouncer, so I went to the counter instead.  The ticket lady told me that tickets were a dollar, so obviously I needed to find some cash.  (Don't think I've ever seen a movie where James Bond gets stopped because he's not carrying any loose change.)

The only obvious exit was to the east, which led to a parking lot where I saw a dead tree, a rusty grate (closed), and a 5 dollar bill.  I quickly grabbed the bill and took it back to the counter, only for the ticket lady to tear it up, as "a $5 grocery bill ain't money bub!".  I knew that was too easy, but it's hard to be mad about being harmlessly tricked by a terrible pun.

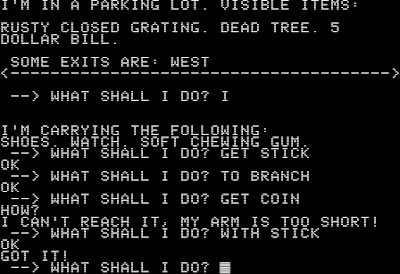
Back in the parking lot, I started looking around.  The tree had a bare branch that I was able to take, and the grate led to a drain with a shiny coin at the bottom.  The gate was held shut by two big bolts, and my arm was too short to reach the coin, but the solution to this one was fairly evident.  I chewed my gum until it was soft, stuck it to the end of the branch, and used it to pick up the coin.  (I complained in Strange Odyssey about the tendency for adventure games to feature a difficult puzzle that blocks progress right out of the gate.  This is the opposite; progress is blocked quite early, but the puzzle to get through is simple and logical.  I much prefer this design: give the player an easy victory early to make them feel smart, then hit them with the hard stuff later.)

Cointaker

With the coin I was able to buy a ticket, but when I tried to go inside the bouncer still tossed me out.  I eventually figured out that I needed to wear the shoes I was carrying.  (Again, Bond going around barefoot?  Terribly out of character.)  This allowed me to get inside, but I noticed as I walked around that my heel was loose.  I've learned that nothing in these games is pointless, so I spent a while messing about with my shoes, trying to open the heel.  Eventually I tried REMOVE HEEL, and a short fuse fell out.  Obviously I was going to need to blow something up later.  I also found a letter, that read as follows: "James: we must get the plans back by tonight! We believe they're hidden within his fun house! Signed, M. P.S. Q says enjoy the gum!"  Okay, so I'm definitely playing Bond, and I'm looking for some secret plans that have been hidden in the funhouse.  I'm always happier playing a game when I know what the hell it is I'm supposed to be doing.

The first room of the funhouse featured a strange mirror, in which I could see distorted images of myself.  There was nothing I could do here, and breaking the mirror got me thrown out for vandalism (requiring that I restart), so I moved on.

The next area was the obligatory Windy Maze, with exits heading off in all directions.  This one only had four areas, and I was able to map it by dropping items with little difficulty.  At this point a maze like this feels like half-hearted padding, the sort of things that's included in an adventure game because it's expected.  At least here it's not out of keeping with the theme, I suppose.

The maze led to a small room, then another chamber with a low ceiling, where the door closed behind me   In this chamber was a skeleton, and three knobs on the wall (yellow, green and blue).  The skeleton collapsed into a pile of bones when I touched it, and I was able to take the bones with me.  There was an exit to the west, but pressing the knobs opened up other areas to explore:

  • Pulling the yellow knob allowed me to go back the way I came, through the maze.
  • Pulling the blue knob opened an area where I found a fortune telling machine and a sign saying that it was out of order.  Sure enough, the machine fizzled when I tried to activate it.  In another room I found a loud steam calliope and a merry-go-round.  Pressing the nearby blue button stopped the merry-go-round, but the calliope was so loud that I couldn't concentrate to do anything else.
  • Pulling the green knob opened into an area where I found a small trampoline I could take with me.  The next room was a shooting gallery, where I found a mounted gun pointing into a window with some clay pigeons on the other side.  I was able to shoot some clay pigeons to no discernible effect.  With little else to do here, I took some spectacles I found on the floor and left.

The west exit from the knob room led to a room with a water tank.  Peering through a window I saw a mermaid inside, waving at me.  I waved back, and continued up a sloping hallway.  Halfway up on a landing I came to a slippery slide, with a sign saying that it was for authorised personnel only.  A gentle blast of air was blowing up my leg for unknown reasons.  Figuring that getting back up might be difficult, I decided to ignore the slide for now and continue exploring elsewhere.

An eastern passage from the landing led to a "windy hall", which led back to the "windy maze", so I guess that explains the air blowing up my leg in a punny sort of way.  Heading further up a rickety staircase, I came to a ledge over a deep pit.  A ladder led down, with a sign that also indicated it was only for authorised personnel.

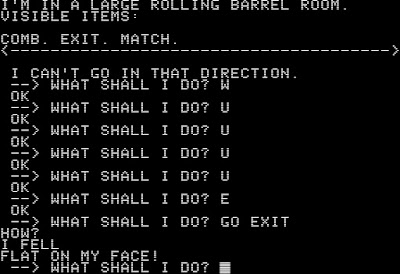
Ignoring the pit for now, I took a passage east and found myself in a rolling barrel room.  Here I found a comb and a match, but due to the rolling I was unable to get out as I kept falling flat on my face.  A ROLL command did the trick, and allowed me to get back out to the ledge.  (I was having trouble with my inventory limit at this point: having to carry the shoes and the ticket around at all times is a bit of a hindrance.)

Facefall

I decided to climb down the ladder into the pit, only to find that the ladder retracted and left me trapped.  In the pit were a locked door and a warm pipe with a valve on it.  I had no key for the door, and there was no handle to turn the valve, so there was nothing I could do down here at the moment.  Luckily I had the trampoline with me, so I was able to jump back up and out of the pit.

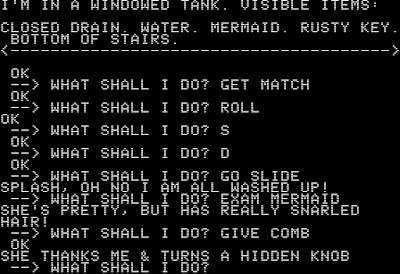
The only place I had left to explore was the slippery slide, which led inside the water tank with the mermaid.  Also here was a closed drain, some water, and a rusty key.  As I predicted, the slide was too slippery to climb back up.  The mermaid was described as "pretty, but with snarled hair", so I gave her the comb.  She thanked me and turned a hidden knob that opened a secret door that led back up to the landing.  (You can also open the drain, which lets out the water and the mermaid with it.  Doing this before giving her the comb puts you in an inescapable position though.)

A View to a Gill

With the rusty key I went back to the pit, only to discover that it didn't unlock the door down there.  So I was stuck, with no obvious path forward.  The grate, the shooting gallery, the mirror, and the room with the calliope and merry-go-round seemed like the best places to investigate right now, so I spent some time mucking about with those.  Eventually I hit on the idea of wearing the spectacles while looking at the mirror, and when I did the mirror showed me a hidden door.  The door in the mirror led to an observation chamber, where I found a valve handle and yet another locked door.  Frustratingly enough, my key didn't work here either.

With the valve handle I went back to the pit, and this time I was able to turn the valve.  It had no immediately obvious effect, but upon some more exploration I discovered that the steam calliope was now quiet.  Aha, that explains the warm pipe!  I was now able to get onto the ride, with a laborious sequence that involved typing GO RIDE, GO HORSE, and GO POLE.  On top of the ride I spotted a rope (to which I was clued in by a piece of hemp falling on my head), but it was a little out of my reach.  Alas, when I tried to jump the moving ride threw me to my death.  I guess I needed to stop it with that blue button after all...

After a reload I climbed the rope onto a landing where there was yet another locked door that my key wouldn't fit.  An exit east led to a storeroom, where I found a wrench and yet another locked door.  Thankfully I could unlock this one, and behind it I found some shelves and a flashlight.  There was also a red knob, but I have no idea what this one activated.

Armed with the wrench, I went all the way back to the carpark outside and was able to use it to remove one of the bolts.  After doing this I could move the grate to reveal an open manhole cover.  (This took a while to find the right command; MOVE and SLIDE GRATE both worked.)  This predictably led down into a sewer and through an open flood door, where I found a dark hole with a grate welded over it.

At this point, after much banging my head against various dead ends, I consulted a walkthrough.  It turns out that I needed to make a bomb to blow up the grate.  This was done by sticking the fuse in the gum, sticking the gum to the grate, and lighting the fuse with the match.  I'd thought of the fuse, but assumed I needed an explosive of some sort to attach it to.  That the fuse and the gum would be enough to blow up the grate never occurred to me.

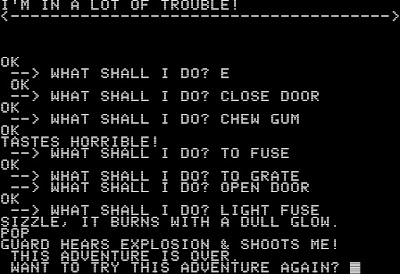
Anyway, my problems weren't over when I did this, because a guard heard the explosion and shot me dead.  Time for another reload...  After some messing about I figured out that the flood door can be closed, and this was enough to blow up the grate without alerting the guard.  The hole led to a long tunnel, and a path upwards.  This path led into the room with the clay pigeons, next to the shooting gallery, but as soon as I entered I was shot dead by a mystery gunman.

The Guard Who Shot Me

I suppose I needed to disable the gun somehow.  I went back to the shooting range to try a few ideas.  First I tried shooting until the gun ran out of bullets, but that didn't work; I just kept shooting clay pigeons with a seemingly never-ending supply of ammunition.  Next I tried to break the gun, after which I was thrown out for vandalism by the bouncer.  At this point I figured that maybe I didn't need to go back inside, so getting thrown out wouldn't be a hindrance.  Even so, the mystery shooter was still able to kill me.  (I'm not actually sure if the bouncer throws you out after you break something, or if he does so before you can do the breaking, so I guess it makes sense.)

I was utterly stuck at this point, and when I looked up the answer I was both amused and surprised.  The trick is to take the OUT OF ORDER sign from the fortune-telling machine and drop it next to the gun at the firing range.  So the assassin thinks the gun's not working and he can't shoot you.  I'm not sure if this is the dumbest or the cleverest puzzle in a Scott Adams game, but it might just be my favourite.

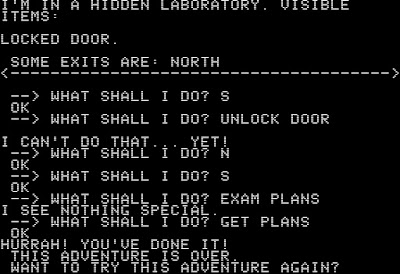
Now that I was able to get into the clay pigeon room, I could make my way to a hidden lab where I found the missing secret plans.  Taking the plans earned me a short congratulatory message, and the game was over.  I'd won, albeit with a little help from the internet (as usual).

You Only Cheated By Looking at a Walkthrough Twice

So, another Scott Adams game down, and another solid effort.  It's impressive that he could churn out so many games and keep the quality up: this is his sixth of seven games in 1979 alone.  He slowed  down considerably from 1980 onward, and I suspect that he burned himself out with this prodigious output.  Even so, his work in 1978 and 79 was enough to cement him a spot among the most important pioneers of gaming's early days.

RADNESS INDEX:

Story & Setting: The spy setting is still a novel one, and I have to give Adams some props for just brazenly making a game that stars James Bond.  There have been a number of games that committed IP theft before this, but I'd say this would have to be the most prominent to date.  The fun house setting makes sense from an adventure/puzzle game perspective, but it's an odd fit for the spy genre, and an especially odd fit for Bond.  None of this hangs together, really. Rating: 1 out of 7.

Characters & Monsters: There's a bouncer, a ticket lady, a mermaid, a guard, and a mystery assassin.  As with most Scott Adams games they don't display any personality, although the ticket lady gets a couple of gruff lines in.  Rating: 1 out of 7.

Puzzles: There's a logic to pretty much all of the puzzles in this game, and none are too frustrating.  I wouldn't have minded a bit more of a clue regarding the fuse/gum (is it meant to be explosive gum?), but otherwise I thought this game did things well.  And it earns an extra point for the OUT OF ORDER sign puzzle, just because I'm tickled by it. Rating: 4 out of 7.

Aesthetics: Not even the switch from TRS-80 to Apple II can drag a terse text adventure off the bottom rung. Rating: 1 out of 7.

Mechanics: Another adequately functional Scott Adams text adventure.  I didn't have much trouble wrangling with the parser, but I've become a bit of an old hand at these games by now. Rating: 4 out of 7.

Challenge: I think this one was pretty well judged: lots of mildly challenging puzzles early on with a couple of real head-scratchers at the end.  The OUT OF ORDER puzzle might be a touch too clever for its own good, but it's hard to ding it.  Rating: 4 out of 7.

Fun: The setting doesn't really work, but it is fun to explore and puzzle out.  There's only so much enjoyment that can be had from an ancient text adventure, but this one got about all it could out of the standard formula, and had a distinct lack of frustrating random elements. Rating: 3 out of 7.

Bonus Points: 0

The above scores total 18, which doubled give a RADNESS Index of 36. That is respectably high, just one point below Adams' first game Adventureland, and five points below The Count (his highest effort).  I'm not sure that it deserves to be six points higher than Pirate Adventure, Voodoo Castle and Strange Odyssey, but I do feel like it's maybe Adams' least-frustrating game to come to grips with.  Perhaps it just caught me in a good mood.

NEXT: The Scott Adams marathon keeps on rolling, with Pyramid of Doom.