
One difference I've noticed between CRPGs and adventure games, in general, is that it's easier in the former to gauge how far you'll progress within a certain timeframe. For the most part, CRPGs are pretty straightforward, and progress is often a simple matter of making your character stronger. With adventure games, progress is made in terms of puzzles solved, and areas unlocked and explored. It only takes getting stuck on one puzzle to bring everything to a crashing halt, and whole weeks can be spent banging your head against the game with nothing to show for it.
I was worried that this would be my experience with Acheton, but I'm happy to report that I've solved a number of puzzles, and made significant and steady progress. As usual I'll break it down by puzzle as I describe my various breakthroughs.
The Wine: One of the treasures in the game is a case of wine that can be found in the wizard's cellar. The problem is that when you try to remove it, the case screams out loud and attracts a pack of dogs that tears you apart. The solution is to also have a pillow in your inventory, to muffle the screams. I discovered this one by accident, but I'll take my solutions where I can get them.
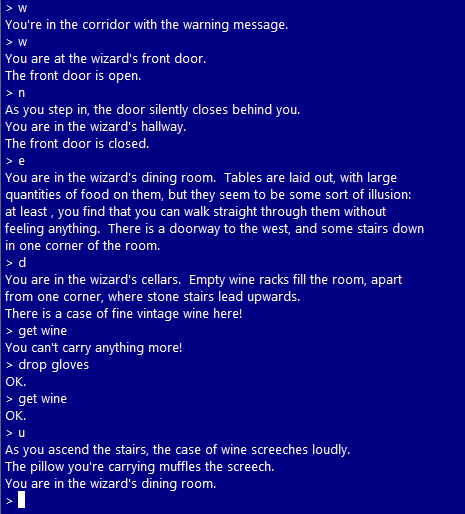 |
| My pillow put a stop to the wining. |
The Gnome and the Lamp: In the wizard's garden there's a gnome who runs away if you try to catch him. I had initially thought that you needed to burn the hedge maze down to catch him, but in the course of testing it to write this blog I discovered that you just need to make three attempts. After the third attempt he offers to give you a clue at the cost of 10 points, but that's pretty irrelevant when you can save and restore at will. He gives more than one clue (which I also just discovered while testing things out for the blog), and I took great pains to get as many of them as possible by abusing the save/restore functions. These are the clues he gave me:
- "The Ruling Council of Acheton wants you to know that you have to get quite close to the giant before you can deal with him, and that it is possible to do this safely." I've already solved this problem, as detailed below, and I can't see how this clue is helpful.
- "The last adventurer who passed this way told me from his death-bed that there is more than one use for the magic wand." I've found what is probably a magic wand, in the tunnels behind the Ningy, but I haven't discovered even one use for it yet.
- "Mr Witt's mother-in-law, who was the last wife of Pharaoh Yelka-Oekim III, has asked me to tell you that there is a great source of heat below Acheton. It is possible for you to make use of this, though you cannot get anywhere near it." No idea about this one yet.
- "The general secretary of the Amalgamated Union of Cave Workers, who was drunk at the time, mandated me to tell you that the prime reason for drinking is to help you relax." I have a pot of London Dry gin, but there are no situations where being relaxed seems helpful just now.
- "The Wizard, when he first brought me into existence, bade me say that the material of your lamp was forged timeless eons ago." This is the one clue I figured out, and I'll get to it in more detail below.
- "The old man, who passed this way as a boy after digging the mine informed me that the amulet is a powerful charm." I've found an amulet in the mine, and there's a deaf old man elsewhere in the caves. I took the amulet to him and tried a number of verbs (GIVE, THROW, SHOW, DROP, WEAR, RUB, WAVE), but he didn't react to any of them.
There might be more clues than these, but I probably tried it around fifty times, so I doubt it. As I said above, though, I figured out the clue about the lamp being timeless. In an earlier post I mentioned that there was a Timeless Cavern, and that lingering in it for too long caused the lamp to burn out. The trick is to leave just one move before the lamp burns out, when it is "burning very brightly". As far as I can tell, that brings it back to a full charge. I haven't tested whether this can be done multiple times, but I doubt it. Adventure game designers are rarely so kind.
The Giant: There's an area with a giant wandering around, who will step on you if you end up in the same location as him. You can slip past him to an alcove, where you'll find two treasures: a beryl, and a porcelain plate. (The plate has a pile of salt on it, which I'm sure will be useful at some point.) The problem is that the way the giant moves around stops you from being able to get back out again. I needed to find something to either help him notice me (an unlikely solution) or to kill him or knock him over (far more likely). As usual when I'm stuck, a look at all of the inventory items I'd found proved helpful. In this case I hit upon the marble, which despite being small seemed like a possible way of tripping him up. Sure enough, if you throw the marble at the giant he goes crashing to the floor and you can escape. The marble even comes through unscathed, which is good because there's a vision swirling in it that I need to decipher at some point.
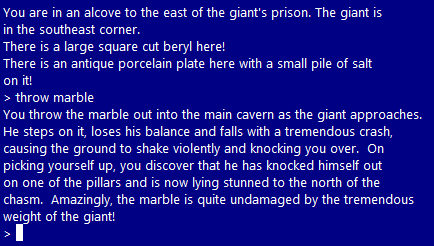 |
| The convenient survival of an essential quest item. |
Swimming: The ocean and the desert were the two major obstacles I'd been concerned with in my last post, and I've made zero progress in navigating the latter. The ocean, however, I'm pretty sure that I'm done with. I got through the swimming portion of it through trial and error. If you swim too far north you'll die in a whirlpool, and if you go too far south you'll die on the cliffs. Swimming north-west three times from the beach will guide you between Scylla and Charybdis, the whirlpool/sea monster combo from Greek mythology, and into some new caves. You can only take one item while swimming, and it needs to be the lamp so that you can illuminate these caves.
 |
| Navigating between Scylla and Charybdis. |
There are two items to be found in the new area: a tiara (one of the treasures) and a dead fish. Eventually you'll arrive at a familiar bridge. In an earlier post I mentioned that there is a bridge where Scylla pops up and eats you when you try to cross. This is the same bridge, but this time you're approaching it from the opposite direction. It's a simple matter to distract Scylla with the fish and cross the bridge back to the main area of the game..
The Dinghy: That's not all that needs to be done on the ocean: there's also a dinghy. You can sail it once you have the triangular cloth, but everywhere I tried to go with it resulted in me being dashed to my death on a coral atoll. Eventually I decided to see what would happen if I just waited a few turns, and let the current take me. It still swept me to my death, but I found that jumping off just beforehand resulted in me being washed up on an island.
On the island I found some driftwood, a single palm tree, and four caves. One of these caves contained some emeralds, but I couldn't find anything else. A ship flying a white flag, and seemingly crewed by ghosts, sailed past without noticing me. I thought perhaps I needed to set the driftwood on fire to get its attention, but I couldn't figure out how. Later on a ship with a black flag landed, and a crew of pirates disembarked and killed me.
This one took a LOT of trial and error. First, you need to climb the palm tree when the pirate ship arrives, otherwise they will find you no matter where you are. While you're hiding, the pirates go into one of the caves before leaving. If you enter the same cave and dig, you'll find a chest full of doubloons.
 |
| Hiding from the pirates, matey. |
With that done, you need to get the attention of the white boat. I was right about the driftwood, but you can't make a fire with it initially because it's scattered all over the beach. I tried all sorts of things to make it into a pile, but all you need to do is pick it up then drop it. It makes sense, I guess, but I only figured it out by accident. Once that's done you can light a fire with a match when the white ship appears, and the ghost crew will pick you up and deposit you in the harbour cave near the slab room, back in familiar territory.
The Ice Maze: This is yet another puzzle I solved by accident. It's a maze of icy caverns, each with three exits. Exploring will eventually put you in an area where the ice cracks under your feet and dumps you into deadly freezing water. When I went to explore it recently, though, I had the thermometer in my possession, which constantly gives you the temperature of the room you're in. The ice caverns alternate between -10 and -4. As long as you're in a cavern with -10 temperature, it's safe to proceed south-east or south-west. If you're in a cavern with a -4 temperature, you can only safely head back north; going SE or SW will kill you. Deep in the caverns I found a sceptre and some mink gloves.
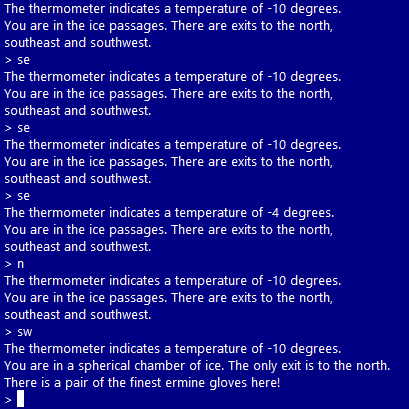 |
| Navigating the ice passages. |
The Combination Room: With a sceptre in my possession, I was reminded that the game also had an orb and a crown. I can't for the life of me remember where the myth comes from, but I know that the three go together, so I took them all to the King's Combination Room to see if anything would happen. When I arrived, the king's butler appeared and presented me with a treasure chest. I go back and forth with puzzles like this. A lot of adventure games require outside knowledge for their puzzle solutions, particularly on the topic of mythology. That's fine for me, because I have a pretty good base knowledge on that topic. Sometimes, though, I feel like an adventure game should be complete in itself.
 |
| Excellent butling, good sir. |
The Roc's Nest: The ice maze didn't just provide me with the solution to the king's combination room, but it also provided me with the mink gloves. With those I was able to take the mithril habergeon, which had previously been too freezing for me to touch safely. I'd been waiting to get my hands on the mithril armour for a while, because I suspected that it would protect me from the Roc in the wizard's garden. The Roc guards the western path of the garden, and when it carries you away its claws puncture your lungs. The armour protects against that, and instead of killing you the Roc carries you to its nest.
 |
| Surviving the Roc's claws. |
In the nest there's a moonstone, and four unhatched eggs. Nearby in a dead end is another treasure, an adamant diadem. Of course, if you hang around long enough the eggs will hatch and a Roc fledgling will descend on you and tear you to shreds. Elsewhere in the area is a locked cage with four winged serpents inside. This was a simple one: you unlock the cage, release the serpents, and find a safe place to wait while the serpents and the rocs kill each other. Once that's done you can enter the cage, where you'll find a tunnel leading back to the wizard's garden.
So that's where I am, quite a bit further through the game than I was as of my last post. I made no progress at all as of last night, though. I've got no idea what to do about the desert, or the ice floe with its various scents, or the wizard's dungeon, or the hall of mirrors. I have the clues the gnome provides now, but none of those are helping much at the moment. I'll give it a few more days, but if I go much longer without figuring anything out I'll probably get some hints from a walkthrough. I've done pretty well to get this far with only looking at one hint, and I won't be ashamed to look a bit more should I get really stuck. It's a challenging game, but not so devilishly hard as I'd been led to believe (at least so far). Maybe I'm just getting better at these things.
The sword, sceptre and crown thing isn't from myth, it's just a common set of regalia. Britain, Scotland, Denmark, etc.
ReplyDeleteStill outside knowledge, of course.
DeleteCheers! That explains why Google wasn't giving me anything specific.
DeleteKeep in mind that this is a British game, too. This is something most Englishmen would be familiar with.
DeleteAwesome progress here. This is definitely the kind of game I could never play alone. With adventures I've found that it really eases my frustration if I have people to bounce ideas off of. How many treasures have you managed to collect so far? From skimming the last post over at Renga in Blue, it looks like you don't need them all in order to unlock the end game. Of course, you won't get a perfect score that way...
ReplyDeleteJust to let you know I have now caught up with the whole of this blog. I am in awe at your persistence and bloody-mindedness, and looking forward to seeing what you do next. (I have to admit, all those PLATO-mainframe CRPGs have rather blended into one for me.)
ReplyDelete